The combination of lines and colors is one of the most expressive tool sets an artist has at their disposal. Nearly infinite in its variety, this combination, when used with thought and purpose, can propel an otherwise mundane drawing to new heights. This combination of line and color has been mastered by many artists throughout the centuries, but few did it better than Alphonse Mucha.
Meet Mucha
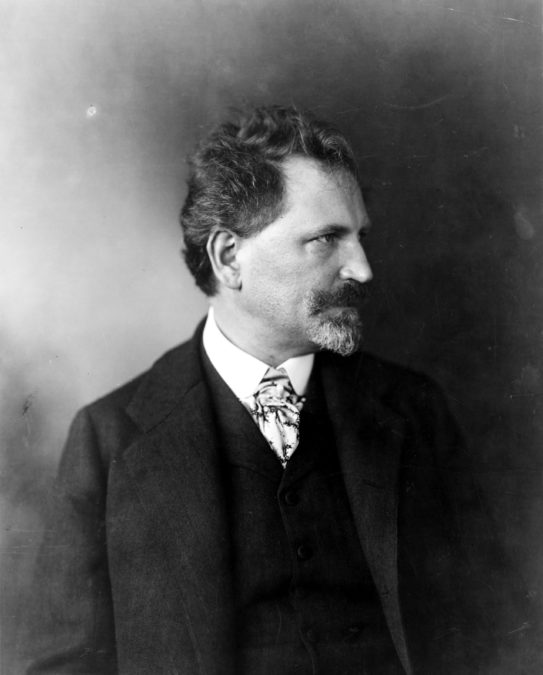
Alphonse Maria Mucha was born July 24, 1860 and died July 14, 1939 after contracting pneumonia while being interrogated by the Gestapo.
A prolific artist, Mucha created works on canvas, as well as designs for furniture, silverware, glassware, advertisements, and more.
Mucha’s work most frequently contrasted beautiful young women with decorative motifs like flowers and lavish borders, set off with soft pastel colors and bold lines.
While his art is enormously influential today, by the time of his death his style was considered outdated.
Thankfully his work is now more popular than ever and we can readily admire it for ourselves.
Mucha was a master of both line and color, and while a thorough discussion of his line work would take more space than I have in this blog post, we can still learn to create the effects of his line and color work in combination and then apply the concepts to our own work.
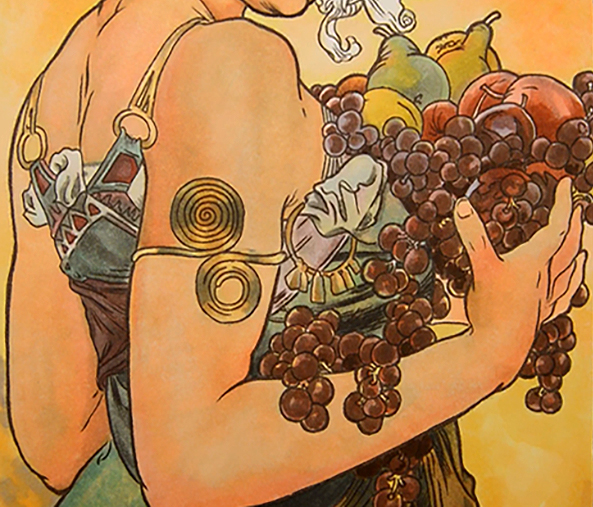
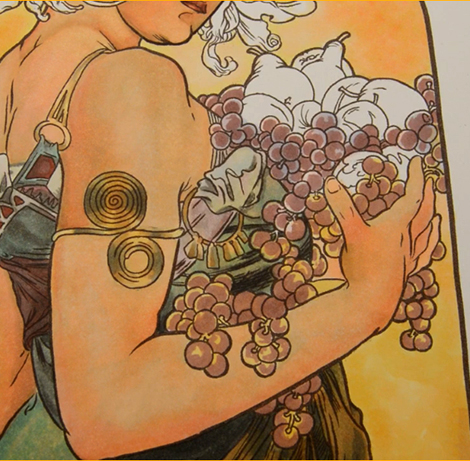
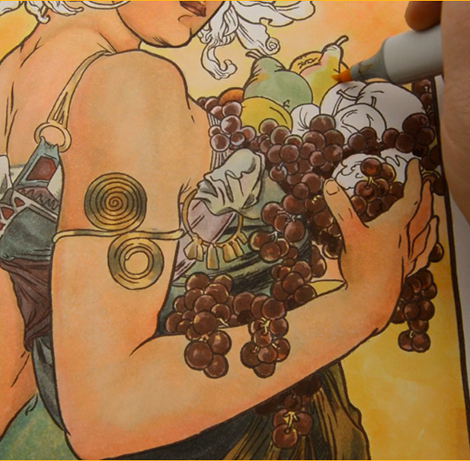
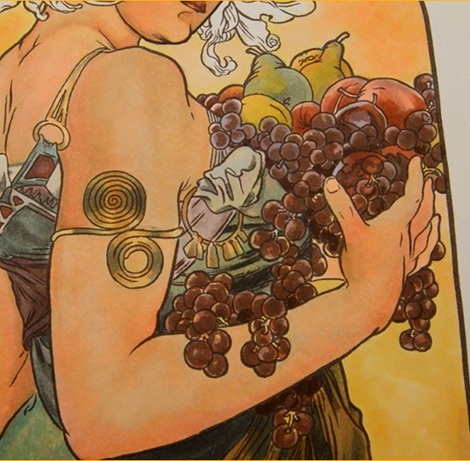
For this tutorial we will be working with a section of Mucha’s “Fruit”.
I chose this section because it exemplifies the effects of bold line work and subtle color effects.
Coloring the Fruit
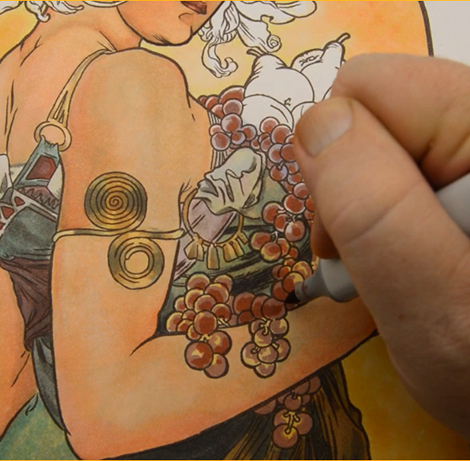
I lay in a rough, uneven base color of R20 on the upper bunch of grapes and a similar uneven base layer of YR31 on the lower bunch.
I add BV31 to the upper bunch, leaving plenty of the original R20 to show through, especially on the “tops” of the grapes.
I darken the grapes with E04, leaving some of the R20, BV31, and YR31 still visible in the individual grapes.
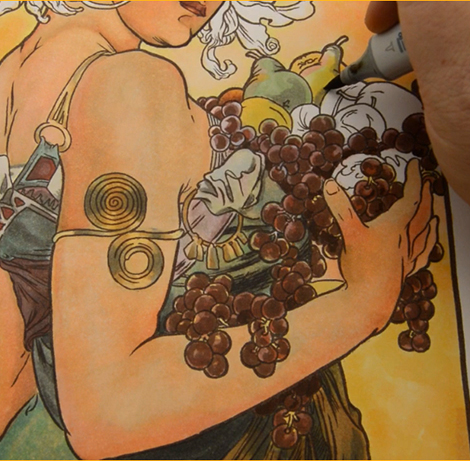
I darken the center portion of each grape with E08…
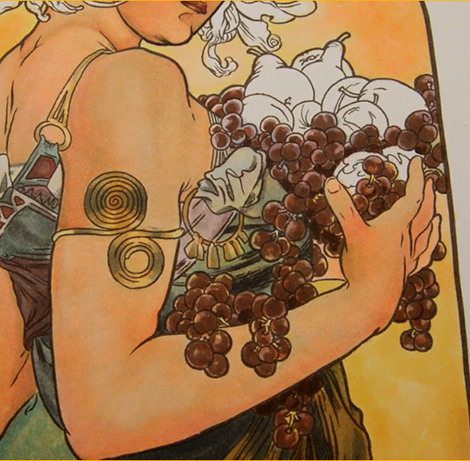
I add darker accents with E27, add stronger color back into each grape with E04, and then restate my darks with E18 to finish the grapes.
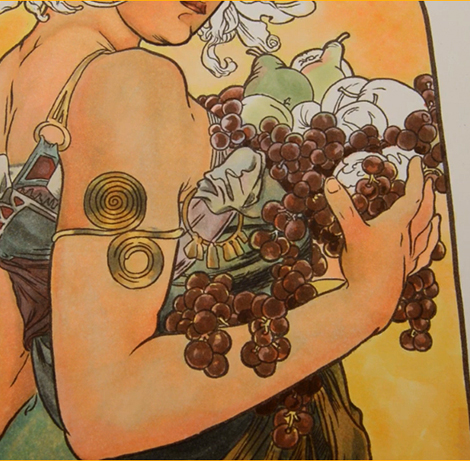
I lay in a base of G21 on the near pear, and a base of G20 on the far pear and the nearer fruit thing that I’m not sure what the hell kind of fruit it is… I then add a touch of R20 to the left side of each pear…
I add YR21 to the peach and orange. (The base for the peach is E04 and was colored with the grapes). I then add YR31 to the “what the?!?” fruit in the foreground… and to the far pear.
I add W4 accents to both pears and the foreground fruit, then soften the W4 with W2.
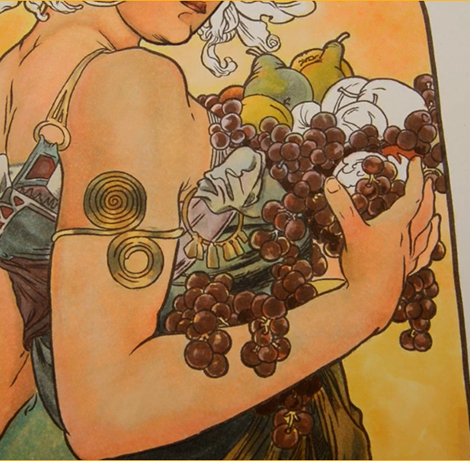
I add a layer of YR31 to the far pear, the foreground fruit, and to the left side of the near pear. I then color the top of the plum near her index finger with E08…
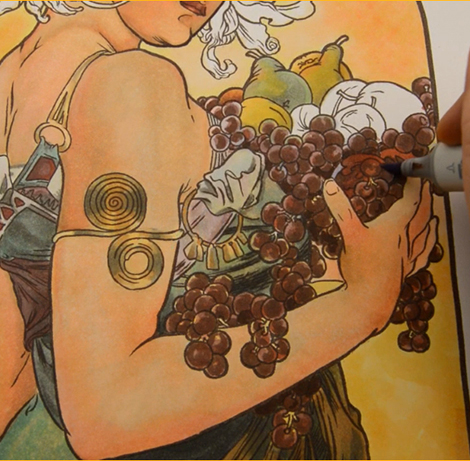
I color the bottom of the plum with E27. I use the same E08/E27 combo for the other plum, then add BV00 to indicate the highlight.
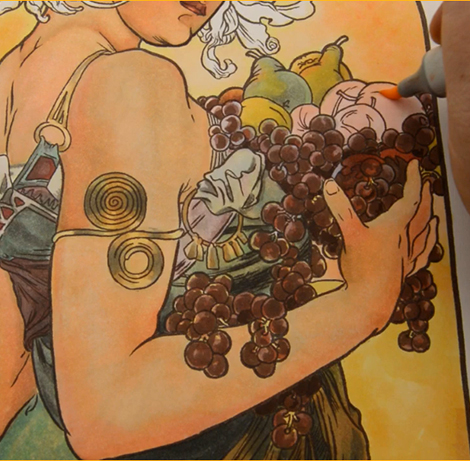
Turning my attention to the apples, I lay in a base with R20, and then “warm” the tops with E00.

I darken the bottoms with E08, and then add cooler touches with E04.
I soften it all together with R20, then restate my “reds” with E08 to finish the fruit.
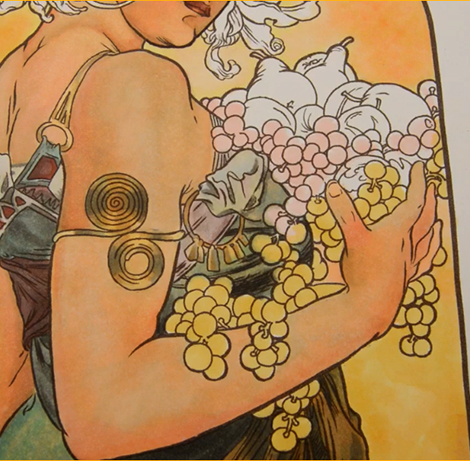
As you can see, the combination of line and color can do amazing things. Unfortunately, too many artists think of line as a simple color boundary – an area of the drawing where color stops – but line and colors are so much more!
So go ahead and try your hand at it.
How helpful was this tutorial?
1 Star: Oh man, that sucked… 5 Stars: Good God, it’s brilliant!
![]()
![]()
![]()
![]()
![]() (25 votes, average: 4.68 out of 5)
(25 votes, average: 4.68 out of 5)![]() Loading...
Loading...

I think it’s a quince, and you got the color right for it!
Great tutorial!
What a quincedence Laurie, I thought it was a quince! Actually, I have no idea what a quince is lol, but thank you for filling me in, I really appreciate it 🙂 I’m also happy you liked the tutorial. Thank you for the awesome comment!
AWESOME!!!!! Thanks for sharing your talent!!!!
Thank you, Pam. We’ve missed you around here!
Thank you so much for the tutorial!
You’re very welcome, Sherry! Happy you liked it 🙂