Your eyes are the doorway to your heart. They reflect your emotions and your inner being. A lot can be concluded from the expression of your eyes. Thus it is no wonder that eyes have been the source of inspiration to poets, authors, and artists since time immemorial.
– Author unknown
There is no question about it, being able to create expressive eyes is a necessity for any figurative artist. Whether you are a realist or work in a more illustrative style, being able to draw and color the eyes in a way that brings life to your characters takes your work to a whole new level.
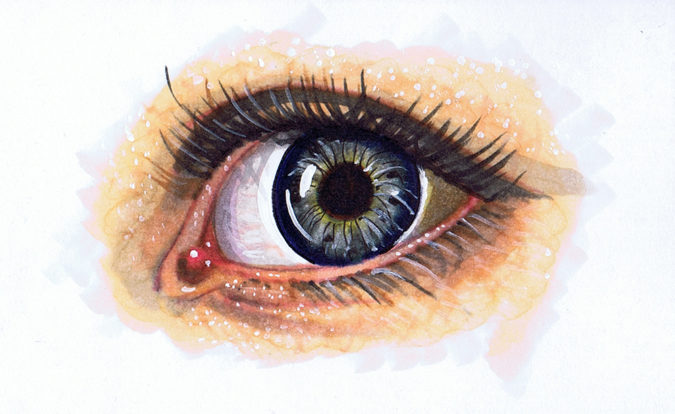
So in this tutorial I’m going to take you step by step through the process I use to create a realistic eye.
As always, my step by step coloring tutorials can be used with any alcohol marker or colored pencil brand. Personally I use Copics, but many of my coloring class students follow along step by step with Prismacolor colored pencils.
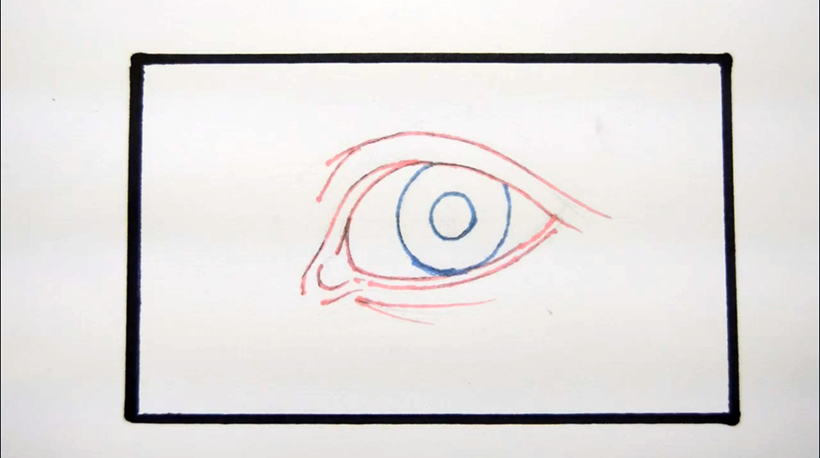
For this tutorial I’ve included a narrated video and a slideshow showing each step of the process, and if you want to draw your own eye so you can color along with me, you can check out my How To Draw An Eye video which will walk you through the process I used to draw the eye for this tutorial.
If you don’t draw but you still would like to color along, you can download my line drawing of an eye to print and color.
For ease of use in this blog post, we’ve converted the PDF book mentioned in the video into a slideshow for your convenience.
Step 1
Colors used:
T1
T5
T6
T9
E0000
E00
E09
E11
E25
B0000
B02
B39
R12
R20
BV31
G17
Y21
0 Colorless Blender
White Gouache
Throughout this tutorial I’ve touched on many important “core” artistic concepts such as warms and cools, saturation and desaturation, and glaze layering. As always, I can’t wait to see what you make, so be sure to post your finished work from this tutorial in the comments section below.
Happy coloring!
How helpful was this tutorial?
1 Star: Oh man, that sucked… 5 Stars: Good God, it’s brilliant!


Awesome technique! What looks so difficult to achieve is made easy!
Thank you, Ninon 🙂
Thank you Christopher Kerry for creating a video tutorial with easy to follow steps. Over the years I have watch many how-to-videos and you have managed to do what those were unable to do, that is take something that looks so incredibly hard and make it simple. I look at my finished eye and can’t believe I did that. I hope there’s more Christopher Kerry tutorials in the near future!
You’re very welcome, Tay. I’m happy you liked it!
Thank you Christopher. That is wonderful. I’ll be trying that soon
Thank you, Julie. Can’t wait to see what you do!
love your tutorial, thanks
Thank you, Ania 🙂
Thank you for an interesting educational tutorial. It’s awesome . I will try it and going to be fun.
You’re very welcome, Yvonne. Looking forward to seeing what you do!
OMG is all I can say. I do not draw and I am average at best with Copic coloring but I so enjoy all of your tutorials. You are such a talented young man. Thank you for such talent…
Thank you, Sharman. That’s very kind of you 🙂
I had fun drawing the eye and coloring It! This tutorial is awesome. Thank you Christopher ?
This turned out awesome, Ninon. Thanks for sharing it with us!
Thanks heaps Christopher, always learning from you!!!
Thank you, Lynda. You’re very kind 🙂
Very helpful! Great tutorial!!
Well, I made one attempt so far. I overworked the piece — and I am possibly pressing too hard on my markers. The whole thing got muddied up and just looked like dark grey mush. I think I must have not allowed drying time for the additional striations with the pen (I used a Sakura Pigma Micron pen and didn’t allow any drying time, really.
So, I am going to try again but use a much lighter touch this time and see how that goes. 🙂
Thank you for sharing your art with the online community. it very like it
This video was incredibly helpful! I loved your tips on shading and highlighting to create depth. The step-by-step process made it easy to follow along. Can’t wait to try this technique on my own drawings!
This video is incredibly helpful! I love the step-by-step approach, and the tips on blending colors really made a difference in my technique. Can’t wait to try this out on my next drawing! Thank you for sharing!