Copic markers are an amazing medium for capturing realistic textures. With proper layering and application of the colorless blender, nearly any natural or artificial texture can be accurately rendered. Their ease of application, coupled with the fact that nearly any “mistake” can be easily corrected, makes Copic markers a perfect choice for texture studies.
Rendering Wood
Like any natural object, the colors of wood are complex and varied, even within a single example. Nature is the greatest artist, and applies her palette of colors in amazing ways. So to create an impression of realism, I’ll be taking nature as my guide and using more colors than a simple light, medium-dark, and dark color scheme.
Step 1: Load the base layer
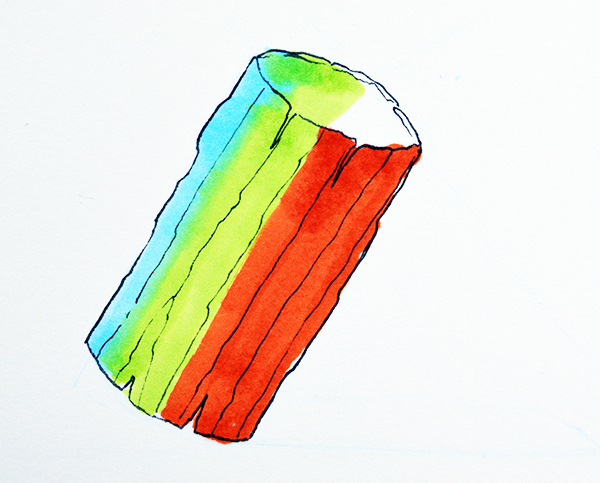 To establish my base colors, I’m using B00, YG03, and YR18. I lay the B00 in first to represent the light hitting the object, then color in the YR18 to represent the shadow side. To bridge these two complimentary colors, I use YG03.
The theory behind these choices is that sunlight, when filtered through the earth’s atmosphere, appears very blue. Because of our brain’s desire for harmony, any time a color is represented in nature, our eyes demand to see the compliment to balance out the original color. To bridge the two compliments, blue and orange, green is a natural choice since it sits between the two of them on the color wheel. Think of it this way – orange is a combination of red and yellow, and the complimentary color to blue. Green is composed of blue and yellow, and therefor shares color characteristics of both orange and blue. It is also the compliment to red, which is the second component of orange. So by moving from blue through green to orange, all the primaries are represented, and the colors are present in complimentary pairs.
Balance baby.
Step 2: Desaturate
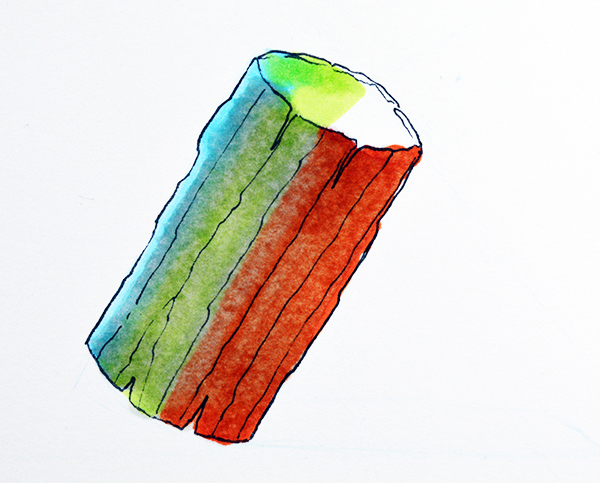 While all of the colors I’ve used actually are present in real wood, nature is a huge fan of subtlety. So I desaturate and “blend” the base colors with a heavy layer of W2 Warm Gray.
Step 3: Establish Shadow Pattern
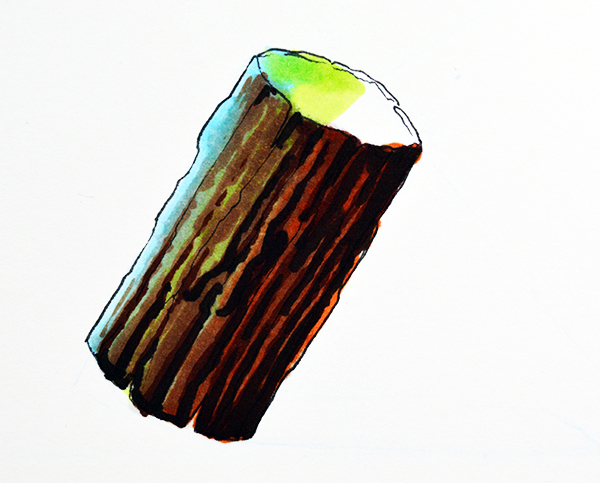 In this step I’m simply looking to bring the colors more in line and establish the patterns of light and shadow. I use E25 as an overall glaze, and then strengthen the shadows with E29 and E24. I bring all the colors into balance with a layer of W2, and then strengthen the overall color effect with strategic applications of E25.
Step 4: Add Texture
 To create texture, I’m using the 0 colorless blender. I use a variety of techniques to get the look I’m after, from holding the blender in one spot with hard pressure for several seconds at a time, to gently lifting areas of color with fast flicking motions. The colorless blender not only adds texture, but also softens the colors underneath to create a more natural look.
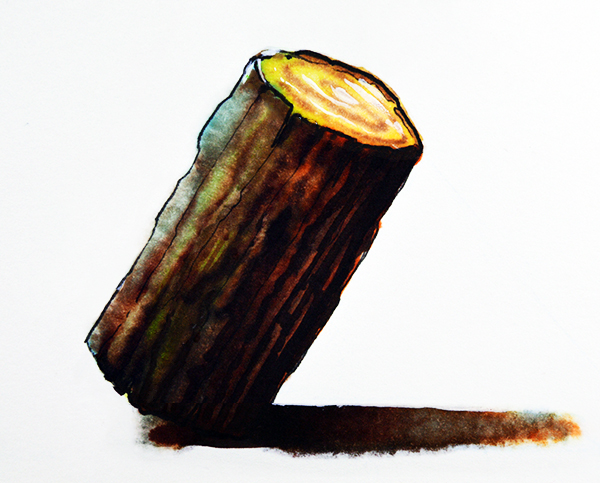
Step 5: Finishing Touches
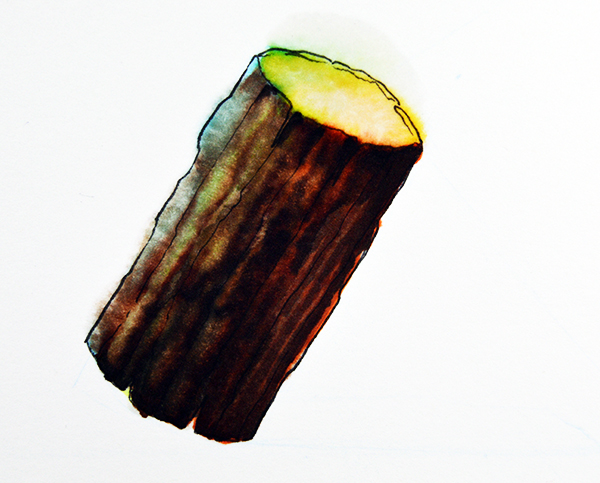
In this step, I’ll take a look at the image as a whole, and add textures and glazes as needed to bring the drawing to completion.
As you can see, it’s easy to achieve realistic results with this method of layering and using the colorless blender to add texture. The colorless blender is an amazingly versatile tool, and when used creatively, adds a level of realism that is virtually impossible to get with any other method.
In the following weeks, I’ll be doing more of these types of texture studies. Sound off in the comments below and let me know what you’d like to see rendered 🙂
Colors used in this drawing:
0 Colorless Blender
B00 Frost Blue
YG03 Yellow Green
YR18 Sanguine
W-2 Warm Gray No.2
E25 Caribe Cocoa
E29 Burnt Umber
E49 Dark Bark
Y23 Yellow Beige
YG05 Salad
How helpful was this post?
1 Star: Oh man, that sucked… 5 Stars: Good God, it’s brilliant!
![]()
![]()
![]()
![]()
![]() (15 votes, average: 4.60 out of 5)
(15 votes, average: 4.60 out of 5)![]() Loading...
Loading...

Hiya Christopher, again another wonderful tutorial, as far as another subject for rendering would you be able to do a glass window? In many of my “planned” subjects (planned as for when I get good enough) they are in rooms with windows in them and I would love to see your way of handling such things.
Hi Lynda, no promises but I’ll see what I can do 🙂