It’s October… the season of monsters, makeup, and long black nights…
In the spirit of the season, I’ve got a special treat for you…
…How to make a monster 🙂
So in the tradition of the classic horror films of the 1930’s, let’s immerse ourselves in shades of gray and bring Boris Karloff’s Frankenstein to life.
Why Color In Grayscale?
Black and white and shades of gray are a powerful means of expression.
Seeing an object stripped of color and compressed into a few simple values creates an impression of solidity and form. Pictures created in monotone or grayscale appear both real and unreal at the same time. On one hand the image appears solid and three-dimensional, which are major triggers for our brains in determining if an object is real. On the other hand, we never see the world devoid of color, and the lack of color in a grayscale work gives it an impression of fantasy.
Working only in grayscale simplifies the artist’s task. When we confine ourselves to working with value only, we free ourselves to focus on creating the illusion of form independent of the demands of color.
By addressing form and color separately, it becomes much easier to create a convincing picture. It seems only natural to work this way, separating value from color, since value and color inform very different aspects of our perception of reality.
Perhaps the most awesome thing about creating images in grayscale, especially if you plan to add color separately, is the ability to make endless corrections and additions. If you make a mistake, simply paint out the mistake with white gouache, scan the image, and print it out on your preferred coloring paper.
Because printers are better at reading black and white than they are at reading color, this method works perfectly to correct major mistakes!
But that’s not all!
For you colored pencil users, the “print and add” method outlined above means you can add unlimited layers! If you’re following along step by step and find your paper has taken as much color as it can hold, simply scan, print, and color over the top of the print!
Each new print is like a fresh sheet of paper, so you can add layers to your heart’s content! Remember, if you plan to add color later, you’ll be coloring on a print anyway.
In this tutorial I’m going to walk you step-by-step through the process of creating your own grayscale monster portrait.
The techniques in this tutorial can be applied to any line drawing to simplify the coloring process.
So let’s get to it.
Coloring Karloff’s Cranium
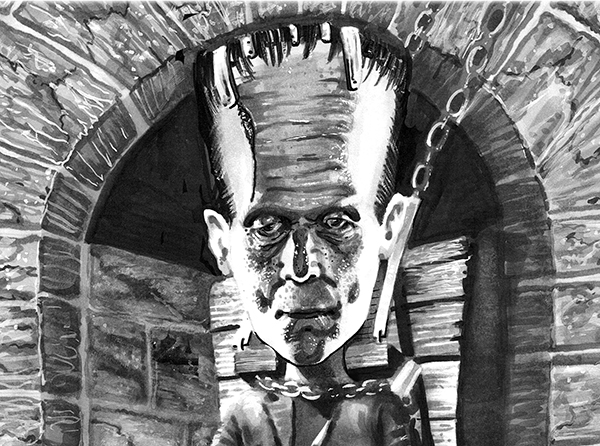
 I’m using a disappearing line drawing for this tutorial, so my line work is printed on 100lb. smooth Bristol board in a very light gray to ensure that it disappears as I color over it.
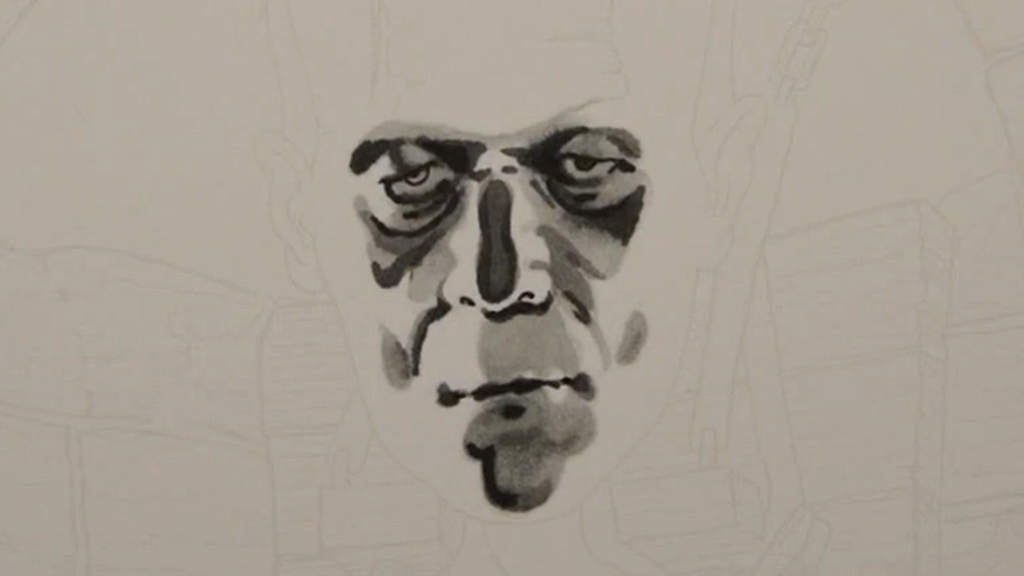
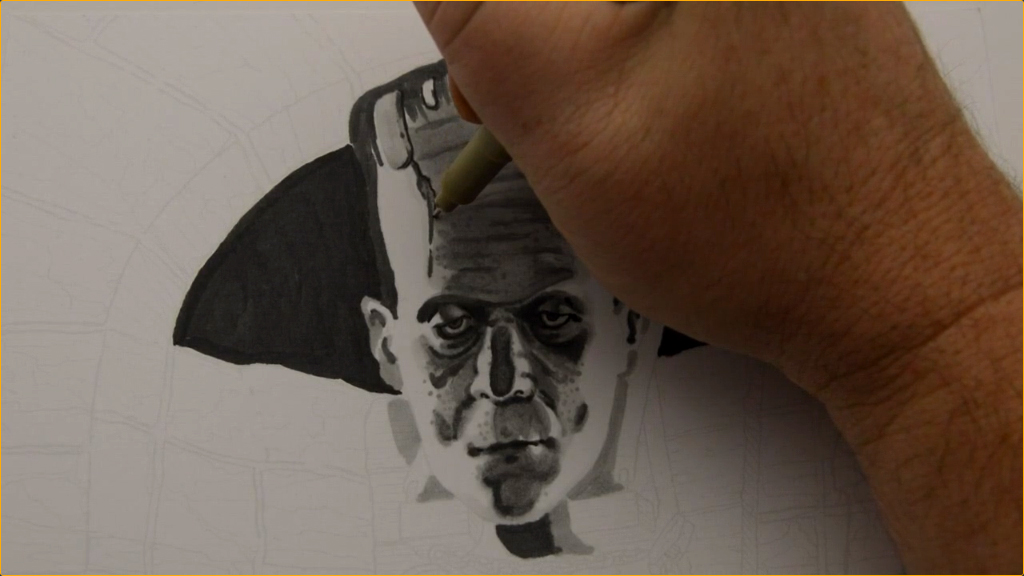
Because the line work is light, I must take care to establish the basic forms of the face before the lines disappear. I use a T2 to “lock in” the areas I feel are important to maintaining the likeness.
 With my “reference points” established, I fill in the shadow areas with T1.
This value is generally lighter than these areas will ultimately be, but it helps me establish the basic forms while still maintaining a visible line drawing.
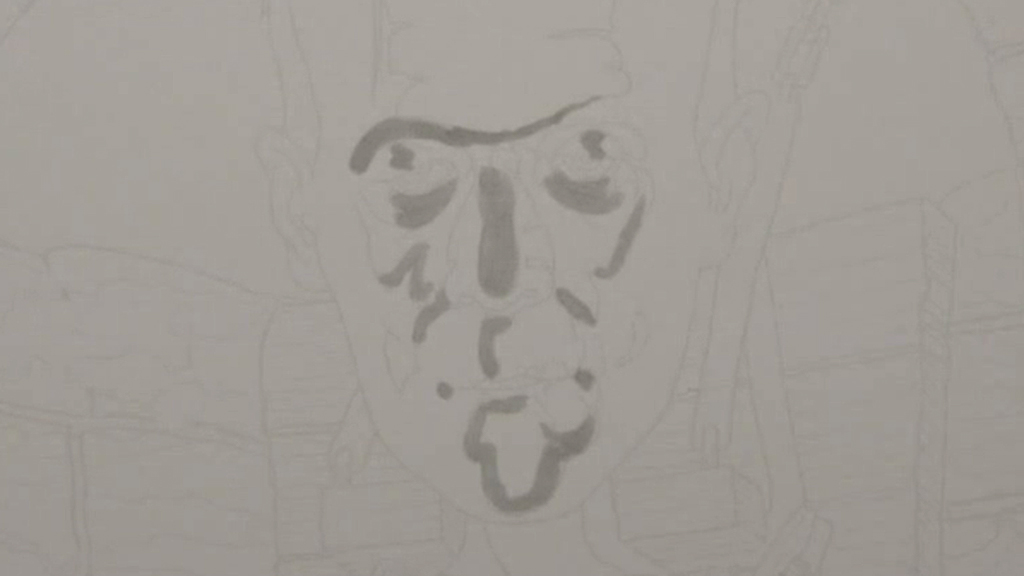
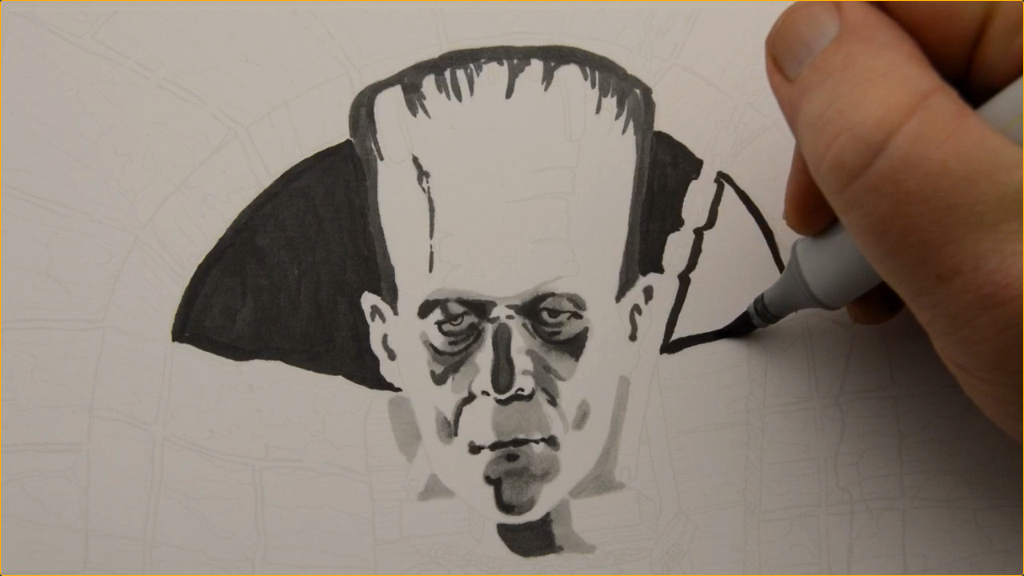
 With my basic forms established in the two previous steps, I now add dark accents with T5.
Again, this value is lighter than it should be, but I find it easier to “sneak up” on a portrait with values light enough to be corrected later, that way if my shapes are a bit off or my portrait isn’t quite right, I’ve not gone too dark to make corrections.
I also define the eyes, nostrils, and corners of the mouth with a 0.3 black multi liner.
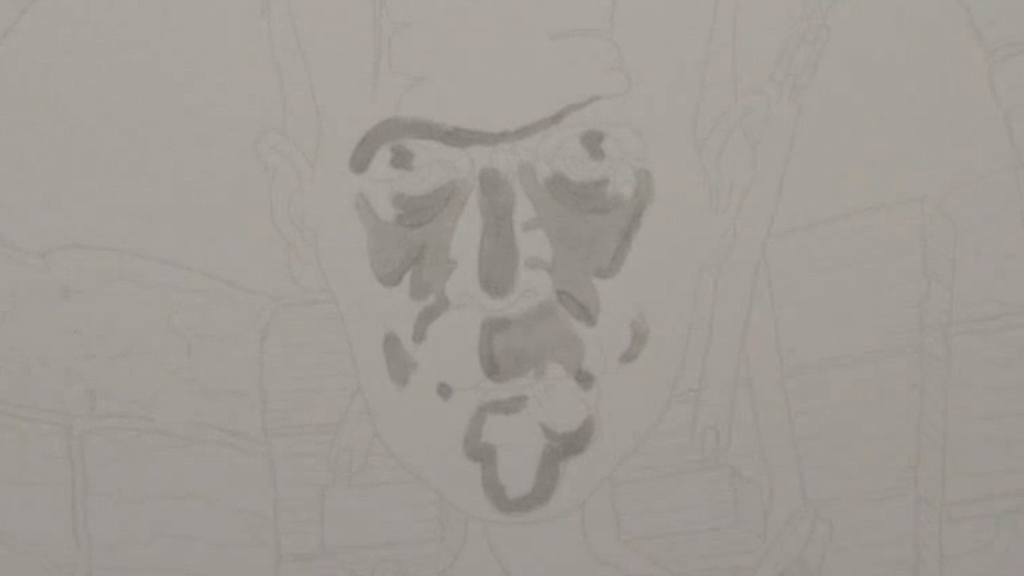
With this step I’ve pretty well “locked” the portrait into place and can see all the major shapes clearly so my line drawing in the features is no longer needed.
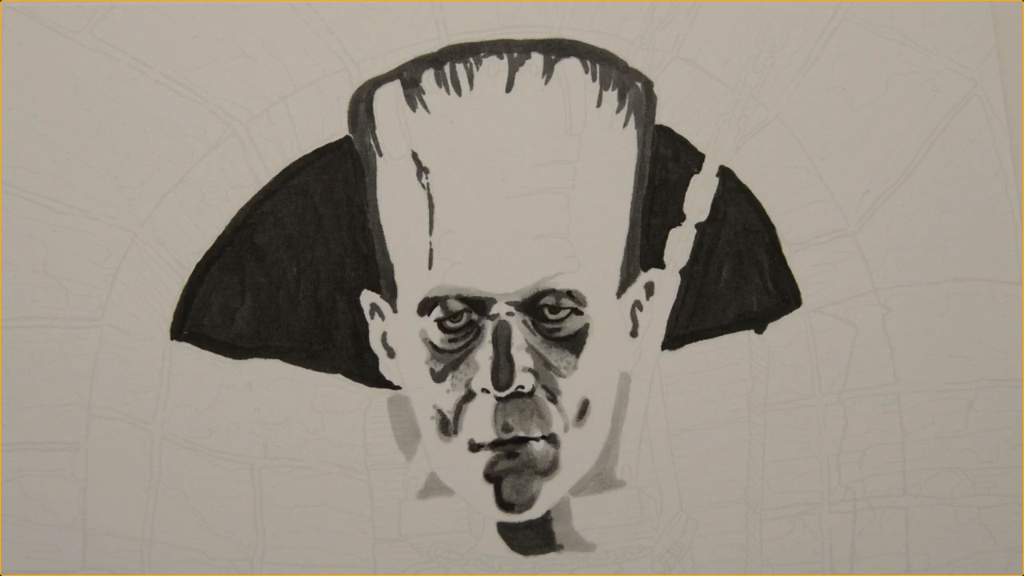
 I use a T4 to shape the eyes, to define the shapes on the bridge of the nose, the outside corners of the nostrils, and to create the cast shadow under the nose. I also use this color to fill in and shape the shadow on the chin.
I then restate my dark accents bringing them closer to their final value with T7. You can see this value in the eye sockets, under the eye bags, on the bridge of the nose, in the shadows of the nasolabial folds, and on the lips.
I also add a layer of T2 to the upper lip, lower lip, and chin, and to the cheeks.
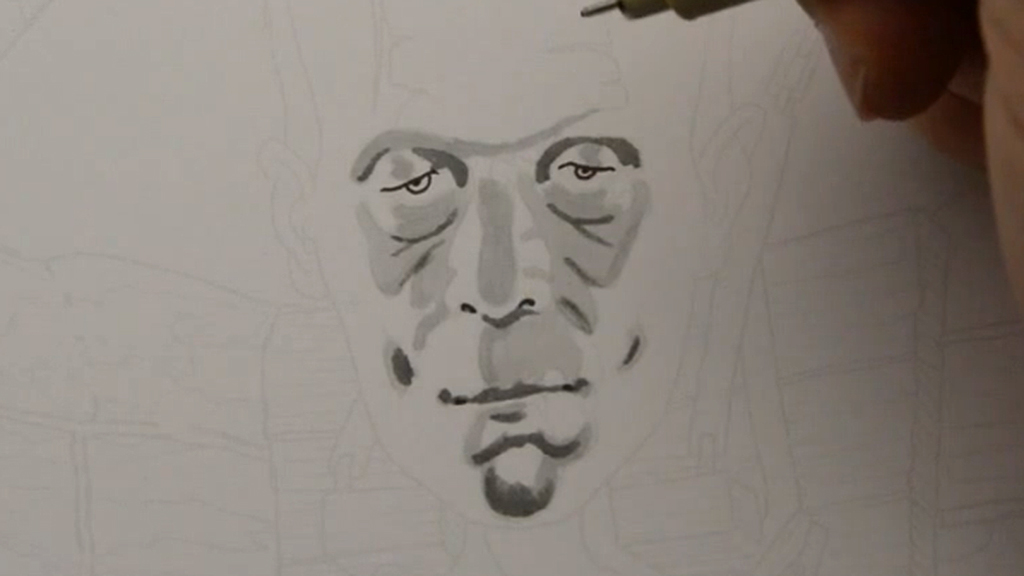
 I blend everything together with a T1 which softens all the previous values, and I also use this value on the whites of the eyes and the tops of the eyelids.
Note: colored pencil users should use this value only on the eyes and the eyelids if trying to create this image in a single pass, rather than using the “print and add” method outlined in the introduction of this post.
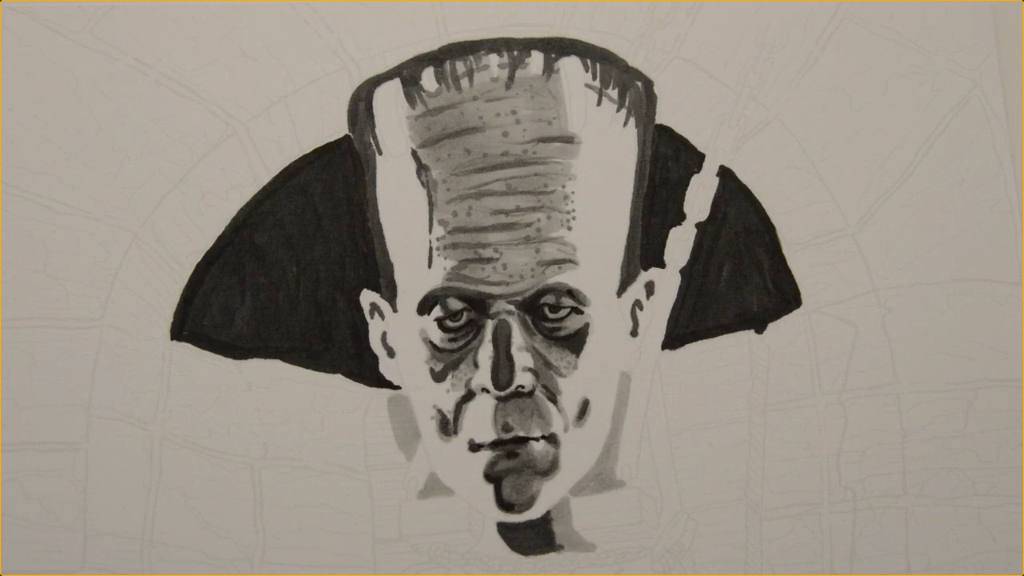
I add darker value accents with T6 to the eye sockets, bags and folds under the eyes, and to the bridge of the nose.
I then begin to “sculpt” the forms of the face with T4, accenting wherever needed to make the face appear three-dimensional.
The exact location of these accents may be different for you depending on your exact placement of values in the previous steps.
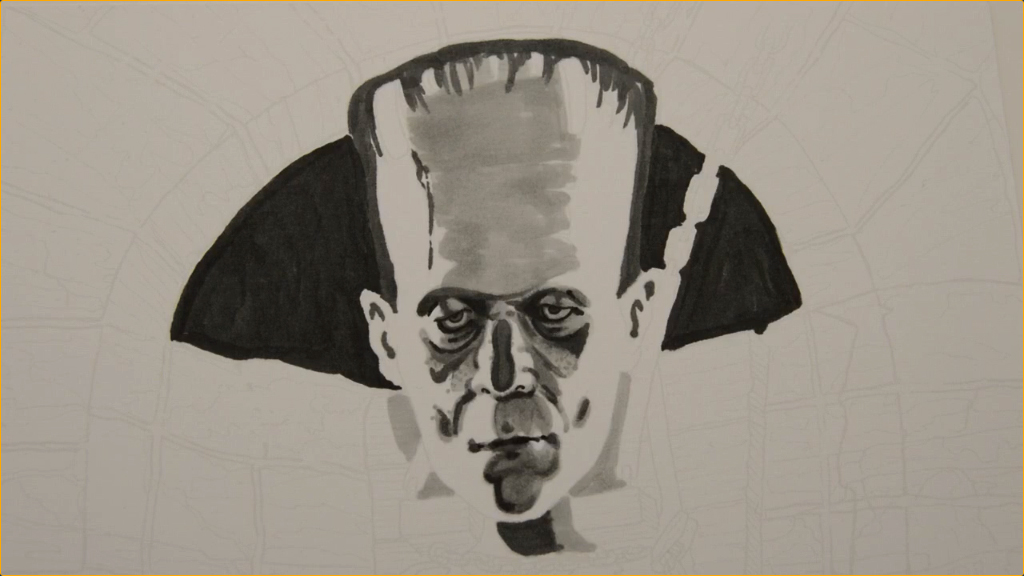
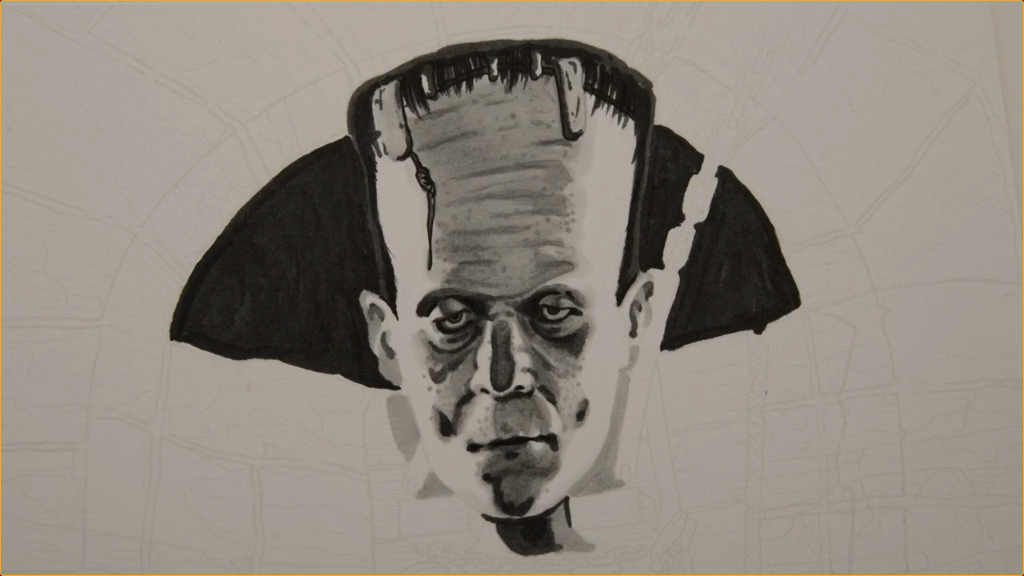
 I place the shadow on the neck and the dark values in the ears and scar on the forehead with T6. I also “mass in” the shape of the hair with this value.
I lay a light T2 value in the chair behind him to define the contour of the lower half of the face. I use this value on his neck as well. The T2 is lighter than these areas will ultimately be, but again, here I’m only trying to define the shape of the head.
I then color in the shape behind the head with T8. Between the T2 and the T8, I have clearly defined the “outline” of his head without actually using an outline.
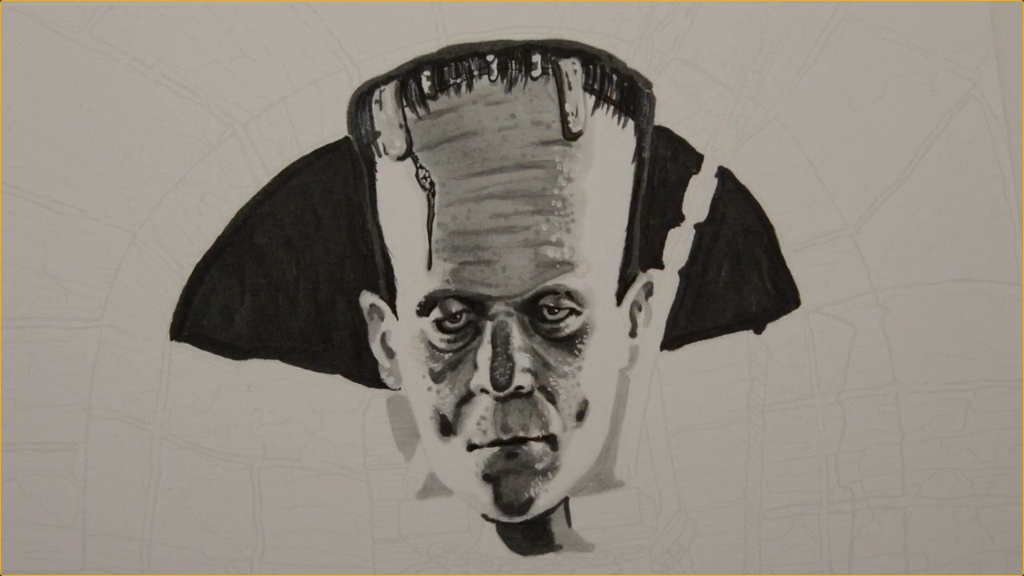
 I use a 0.3 multi liner to add definition to his eyes and eyelids, nostrils and corners of the mouth. (Colored pencil users should use a black pencil for this step.)
I also add accents of T5 to the eyelids, sides of the nose, to the area of the philtrum (the vertical groove between the bottom of the nose and upper lip), to the chin, upper lip area, and to the hollows of the cheeks. I also use the T5 to add pores.
 I add a shadow to the bottom of the nose and soften the shadow of the wrinkle at the top of the nose with T2.
At this point the likeness is well established. The values are still relatively bold and unblended, but it actually looks like the actor who played the monster (Boris Karloff).
I now indicate the main shadow shape on the forehead with T2.
 I then add wrinkles with T5, and soften the edges of the T5 with T4, and add texture dots to indicate pores.
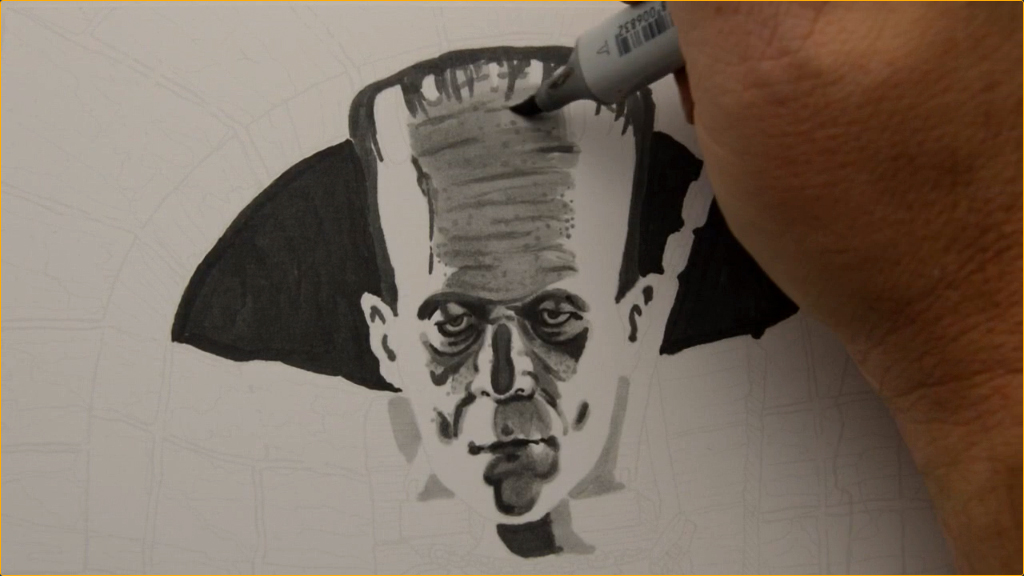 I blend the forehead with an overall layer of T2.
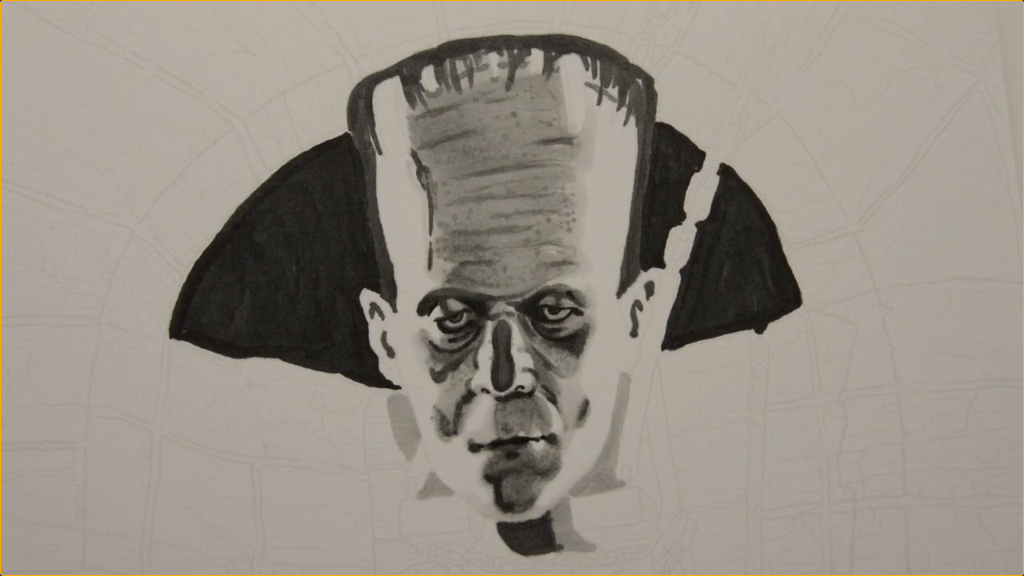 I use T0 to help soften the transitions from the dark values on the center of the forehead to the white of the paper on both sides of the forehead and on the transitions on the cheeks, upper lip, and chin.
Essentially I used the T0 anywhere the darker values on the center of the head meet the pure white paper on the sides of the head.
 I add accents of T3 to the forehead and the “staples” at the top of the head, and to add texture to the face.
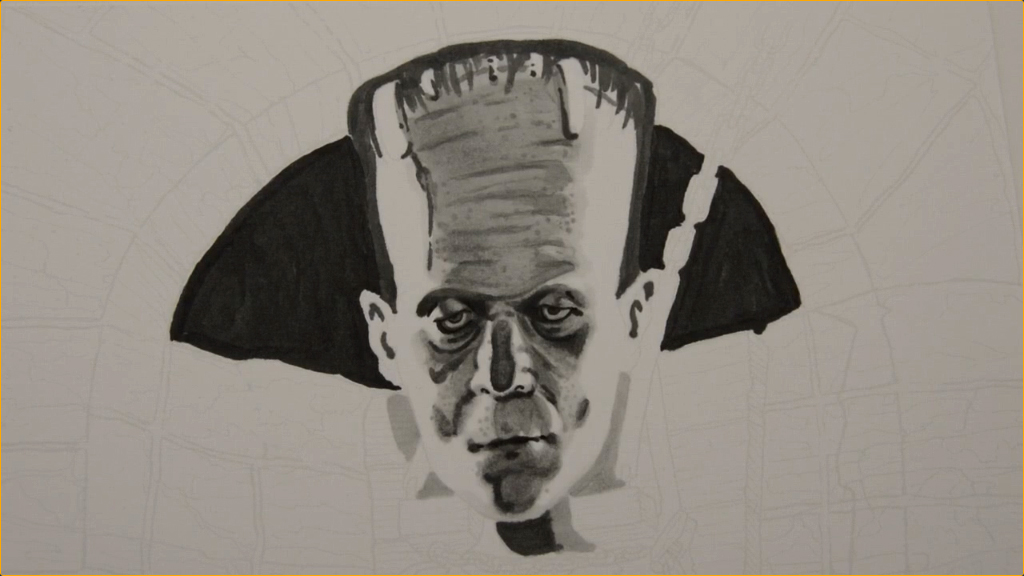
I then add shadow accents to the staples with T6 leaving them rough and unblended.
 I add a “metallic” texture to the staples with T2 and blend with T0.
 I add definition to the ears with T2, then add definition and “crispness” to my dark shapes with a 0.3 multi liner.
 I darken and refine the hair with T8 and then strengthen any dark accents in the face that may have gotten too light by blending in previous steps.
The portrait is more or less complete.
 I add white gouache to the highlights in the eyes, to the sides of the face, under the eyes, above the top lip, to the bottom lip, chin, and forehead.
I also add “wet” white gouache to the bridge of the nose and soften it out before it dries.
I add highlights to the staples and scar to bring the portrait to full completion.
How helpful was this tutorial?
1 Star: Oh man, that sucked… 5 Stars: Good God, it’s brilliant!
![]()
![]()
![]()
![]()
![]() (6 votes, average: 4.50 out of 5)
(6 votes, average: 4.50 out of 5)![]() Loading...
Loading...

so I was kind of trying to figure out if I should do green/blue or some gray levels in a model kit. I plan on in the next week or so working on Frankenstein model kit by polar lights, which I found on amazon website, we don’t seem to have a model kit store in Redding,CA. at this time, that has a lot of character models to do as a hobby, my best place for finding models kit that my parents are willing to buy me is amazon website, we had a model store in redding but it seems like last year at some point, that store had closed or moved I am not sure which since I was never able to find out what happened to it, it happened around the time of that last summer fire, I guess a model kit store closing never made the news which is sad, since all they seem to talk about is that virus that going around, anyway now is a great time to work on model kits around home, I started using my water based oil paints for my model kits instead of model paints, since the paint brushes last longer that way. since they can be when cleaned in water a lot better. anyway I hoping to find good info for skin color for the wolf-man, Frankenstein, and Dracula characters since those are the model kits I be coloring soon.